
To understand how do ice makers work, consider that they create cubes by circulating refrigerant to freeze water in a metal mold, then briefly heat it so ice slides into a bin; they combine refrigeration cycles with mechanical controls to provide a steady supply.
How these ice makers work
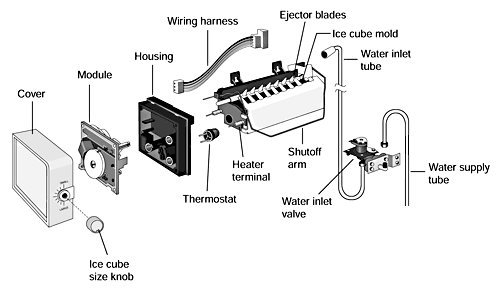
| Part or input | What it does | What you notice when it goes wrong |
|---|---|---|
| Water valve | Opens to fill the mold | No ice or tiny cubes |
| Evaporator coil | Freezes water in the mold | Mold stays warm or wet |
| Thermostat | Detects when ice is frozen | Ice makers run too long |
| Heating element | Warms mold to release ice | Ice cubes stay stuck inside |
| Ejector arm | Pushes ice into the bin | Ice piles up in mold |
| Storage bin | Holds the finished ice | Ice melts or sticks together |
The water valve typically fails due to sediment buildup from hard water. If you hear a hum but see no flow, the solenoid is likely burnt out. Replace it if the screen is clogged.
For the thermostat, watch for the cycle time. Most units should finish within 30 minutes. If it runs for over an hour, the sensor has lost its calibration.
The heating element is a common point of failure. If the mold feels cold to the touch during the harvest phase, the heater has likely snapped. Test it for continuity with a multimeter.
Finally, check the ejector arm alignment. If the arm is bent, it will skip over the ice cubes entirely. A simple manual adjustment can often restore full functionality. If the arm is loose, tighten the mounting screw immediately to prevent mechanical fatigue.
What happens, step by step
- The controller opens the water inlet valve for 5 to 10 seconds, filling the ice mold with fresh water from your home line.
- Refrigerant flows through the evaporator coils, drawing heat away from the mold until the water reaches freezing point, typically taking 30 to 60 minutes.
- The thermostat senses the temperature drops to the harvest setpoint, signaling the system to stop the cooling process and prepare for the harvest.
- A small heating element warms the base of the mold for roughly 60 to 90 seconds, loosening the bond between the ice and metal.
- The ejector arm rotates, physically pushing the cubes out of the mold and into the storage bin located directly beneath the unit.
- Once the mold is filled, the system closes the water valve and begins the freezing cycle, assuming the bin isn’t full.
Why this matters when something goes wrong
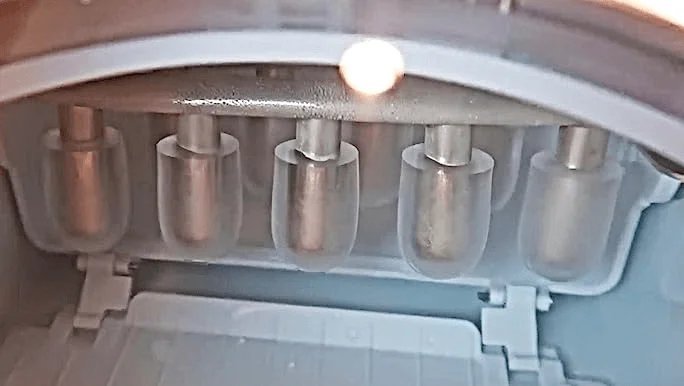
Troubleshooting requires identifying whether the failure is electrical or mechanical. If the ice maker fails to produce any ice, the problem often lies with the water supply or the inlet valve, which you can verify by checking if the line is kinked or the shut-off valve is closed. If the unit produces ice but fails to eject it, the heating element or the thermostat is likely faulty, as these parts manage the transition from freezing to harvesting. If you hear the motor running but no movement occurs, the ejector arm may be jammed by a misaligned cube, which is a common mistake that causes unnecessary strain on the internal drive gears.
What you can change, and what you cannot
What you control
- The water pressure supplied to the unit’s inlet valve. Aim for 20 to 120 psi; anything lower causes hollow cubes, while higher pressure risks internal leaks.
- The temperature setting of the freezer cabinet. Keep this at 0°F. If you set it above 5°F, the ice will clump together, potentially jamming the auger.
- The cleanliness of the ice storage bin. Wipe it monthly to maintain hygiene; use a descaling solution if mineral scale builds up.
- The frequency of filter replacements. Waiting longer allows sediment to clog the solenoid valves, which costs a significant amount in professional labor to replace.
What is fixed
- The internal timing of the harvest cycle.
- The physical shape and size of the ice mold.
- The voltage requirements of the internal heater.
If the unit requires electrical repairs beyond a simple reset, contact a certified technician. Attempting to bypass internal safety switches voids your warranty and poses a severe shock risk.
Getting more out of it
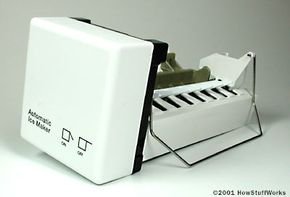
Consistent ice production depends on maintaining the right environment inside your freezer. Ensure your freezer stays at zero degrees Fahrenheit. Warmer settings force the ice maker to run longer cycles, which increases energy use and risks melting the ice in the bin.
If you notice the ice tastes like other foods, replace the water filter regularly. The carbon inside loses its ability to block odors over time. A common mistake is waiting for the “replace filter” light to trigger, but by then, your ice has likely already absorbed freezer odors.
For models with a harvest sensor, keep the area around the arm clear of frost buildup. Thick ice deposits can trick the sensor into thinking the bin is full when it’s actually empty. If your bin stops filling, check the sensor arm first. If it’s encased in ice, use a warm cloth to melt the obstruction rather than a sharp tool, which can damage the delicate internal mechanism.
Check your user manual for the specific reset button location. This varies by model; check the label inside the door.
Final Thoughts
Keeping your machine clean is the best way to ensure your drinks stay fresh and clear. You’ll want to check the water filter every few months to prevent mineral buildup. If you notice the cubes getting smaller, it’s time to swap that filter out so your ice stays perfectly crisp.
Related guides

Pingback: How to Work an Ice Maker
Pingback: How Do Commercial Ice Machines Work: The Cooling Process