
To understand how does an ice maker work, consider that it creates ice by circulating refrigerant through a metal mold while water fills the tray. The process uses a cooling cycle and a heating harvest phase to chill water into solid cubes and then release them.
How does an ice maker work: The internal process
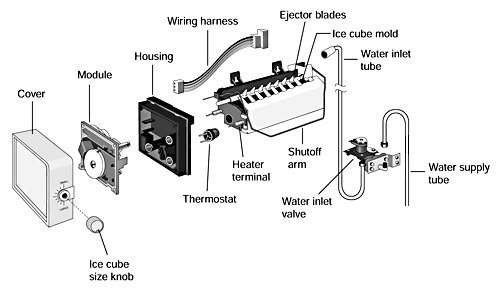
| Part or input | What it does | What you notice when it goes wrong |
|---|---|---|
| Water inlet valve | Controls water flow into tray | Water leaks or no ice forms |
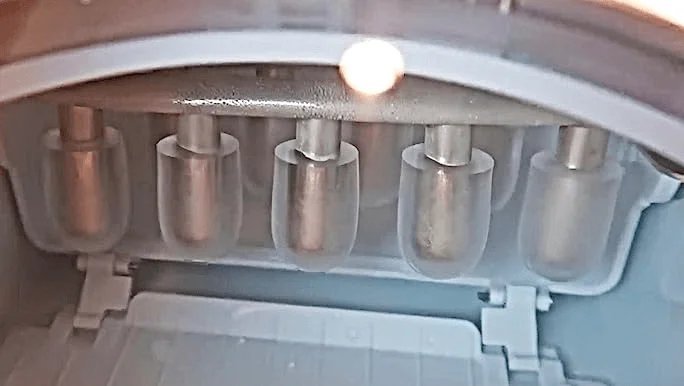
| Mold or tray | Holds water during freezing | Oddly shaped or cloudy ice |
| Evaporator coils | Removes heat from the water | Ice stays liquid or melts |
| Thermostat | Detects when ice is frozen | Ice maker stops or runs constantly |
| Ejector blades | Pushes ice into the bin | Ice jams or blocks the arm |
Most users mistake a faulty inlet valve for a broken pump. If you hear a loud buzzing sound but no water enters the tray, the valve’s solenoid is likely burnt out. You must replace the entire valve assembly to restore flow.
Cloudy ice usually points to mineral buildup or a failing water filter rather than a mechanical defect. If the ice looks white, swap the filter first. If the ice is clear but misshapen, check for issues with the water fill level or the mold geometry.
If the thermostat fails, the unit may cycle every twenty minutes, creating slushy ice. Check the freezer temperature first. If your freezer stays above 10°F, the thermostat is working fine, but the compressor is struggling to keep up.
Finally, never force a jam out of the ejector blades with metal tools. You risk scratching the mold, which causes ice to stick permanently. Use a plastic spatula instead.
What happens, step by step
-
The control board signals the water inlet valve to open for 5 to 10 seconds, filling the mold with fresh water. If the water pressure in your home is too low, the valve may not allow enough water into the tray, resulting in small or incomplete ice cubes.
-
The compressor starts the cooling cycle, pumping refrigerant through the evaporator coils to lower the mold temperature below 32 degrees Fahrenheit.
-
The water sits undisturbed in the tray for 30 to 45 minutes. This duration fluctuates based on your freezer’s internal temperature and ambient room heat. If you frequently open the freezer door, expect this phase to extend by at least 15 minutes.
-
A thermostat senses the mold temperature reaching the preset freezing point, triggering the harvest cycle to stop the cooling process.
-
A small heater warms the mold surface for roughly 90 seconds to loosen the ice cubes from the metal walls. If the heater fails, the ejector blades may jam or break.
-
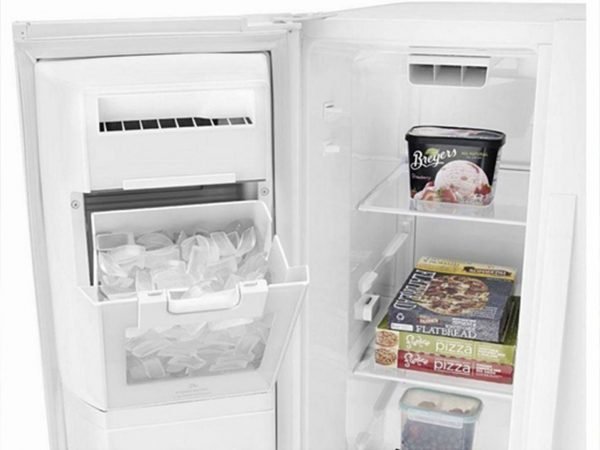
The ejector blades rotate to push the ice into the storage bin. The system then resets. If the bin is full, the sensor arm remains elevated, preventing a new cycle.
Why this matters when something goes wrong
Knowing the cycle helps you identify if a failure is mechanical or electrical. If your unit stops producing ice, the problem is usually the water supply or the thermostat.
If the water inlet valve fails, the tray remains dry. No ice can form regardless of how cold the freezer gets. Test this by listening for a hum behind the unit when the cycle begins. If you hear silence, the valve is likely dead.
Conversely, if the thermostat is broken, the heater might activate too soon. This results in slushy ice or a failure to cycle entirely. A common mistake is assuming the compressor is failing when the real culprit is a faulty sensor. This misdiagnosis costs hundreds in unnecessary repair calls.
Use this decision rule: if the tray is dry, check the water line and valve first. If the tray contains water that never freezes, check the thermostat. If the freezer is too warm, the mold may never reach the temperature required to trigger the harvest cycle, leaving you with liquid water.
What you can change, and what you cannot
Things you control
- The temperature setting of your freezer.
- The water pressure at your home supply.
- How often you empty the storage bin.
- The cleanliness of the ice mold area.
Things fixed by design
- The cycle time for the freezing phase.
- The physical shape of the ice cubes.
- The internal wiring of the control board.
If the machine requires electrical repair or internal valve replacement, contact a certified appliance technician; attempting these repairs yourself can void your warranty or cause a water leak.
Getting more out of it
Consistent ice production depends on keeping the air vents inside your freezer clear of obstructions. If you pack the freezer too full, the cold air can’t reach the ice maker, leading to longer cycle times and smaller cubes.
Aim to keep the bin about half full to prevent the sensor arm from jamming, which stops the production cycle automatically. If you see the arm buried in ice, manually level the pile to trigger the next batch.
If you notice the ice tastes strange or appears cloudy, replace your water filter regularly to remove mineral buildup. This simple habit keeps the water flow steady and ensures the ice remains clean.
Most people wait until the water pressure drops to change the filter, but this mistake often leads to sediment clogging the internal solenoid valve. If your ice is hollow or misshapen, replace the filter immediately regardless of the six-month schedule.

Pingback: How Do Ice Makers Work: The Step-by-Step Cooling Process
Pingback: How Does a Ice Maker Work: The Cooling Cycle Explained